
Renovation budgets rarely blow up because of one big mistake. Instead, they leak steadily through a dozen small decisions that seemed reasonable at the time, until the final invoice tells a different story. Knowing exactly where the money goes before you start swinging hammers can mean the difference between a project that finishes on budget and one that drains your savings account. This guide breaks down the specific line items that quietly eat renovation dollars fastest, and what you can do about each one.
Structural Surprises Hidden Behind Walls

Once demolition starts, contractors often find water damage, outdated wiring, or rotted framing that nobody could have seen during the initial walkthrough. These discoveries are the single biggest source of budget overruns because they are unpredictable and non-negotiable once uncovered. Homeowners who skip a proper inspection before signing a contract are gambling with thousands of dollars they didn’t budget for.
A seasoned professional can help you anticipate these risks before they become expensive emergencies. Bringing in a local architect early in the planning phase often pays for itself, since they can evaluate load-bearing walls, moisture issues, and code compliance before construction begins, catching problems on paper instead of after the drywall is already open.
- Set aside 10 to 20 percent of your total budget as a structural contingency fund
- Ask for a pre-renovation inspection, not just a design consultation
- Request that your contractor document existing conditions with photos before demo
Permit Delays and Inspection Bottlenecks
Permits feel like paperwork, but the fees, revisions, and scheduling delays associated with them can quietly stall a project for weeks. Every week a job sits idle, you are often still paying for storage, temporary housing, or financing costs, even though no visible work is happening. Many homeowners underestimate how many separate inspections a single renovation might require, from framing to electrical to final occupancy.
Working with established home builders who already have strong relationships with local permit offices can shave real time off this process. Builders who regularly submit applications in your municipality tend to know exactly what inspectors look for, which reduces the number of failed inspections and costly do-overs.
- Confirm who is responsible for pulling permits before signing a contract
- Ask for a realistic permit timeline, not just a construction timeline
- Factor inspection scheduling into your move-out or move-in dates
Custom Cabinetry Versus Ready-Made Options

Kitchen and bathroom cabinets are one of the most expensive line items in any remodel, and the price gap between custom and factory options is enormous. Fully custom cabinetry built to exact specifications can run two to three times more than comparable stock sizes, and the lead time is often much longer.
To put real numbers on it, stock cabinets typically run $100 to $300 per linear foot installed, semi-custom lands in the $300 to $700 range, and true custom work can climb past $1,000 per linear foot depending on wood species, finish, and hardware. For an average kitchen with 25 linear feet of cabinetry, that’s the difference between roughly $5,000 and $25,000 before countertops or installation labor even enter the equation.
Lead time matters just as much as price. Stock cabinets are often available within a week or two since they’re mass-produced in standard sizes, while custom orders can take eight to sixteen weeks to build, which stretches out the entire renovation timeline and delays every trade scheduled after cabinet installation.
Semi-custom cabinetry often offers the best middle ground, giving homeowners adjustable sizing, drawer configurations, and finish choices at a fraction of full-custom pricing. Unless a kitchen has unusual dimensions, oddly placed plumbing, or a design vision that stock sizing simply can’t accommodate, semi-custom or high-quality stock lines can deliver nearly the same look without draining the renovation budget.
Custom cabinetry is often where renovation budgets take their biggest hit, with fully custom builds running $500 to $1,200 or more per linear foot once you factor in design fees, specialty finishes, and installation. Semi-custom options trim that cost somewhat, but you’re still paying a premium for made-to-order sizing and finish choices that many kitchens don’t actually require.
For homeowners trying to protect their budget without sacrificing quality, wholesale cabinets have become a popular middle ground. Buying in bulk through a distributor rather than a boutique showroom often delivers solid wood construction and modern finishes at a fraction of the custom price, especially when the layout doesn’t require unusual dimensions.
The savings show up because wholesalers cut out the showroom markup, design consultations, and slow production timelines that inflate custom pricing. Many offer plywood boxes with dovetail drawers and soft-close hardware, the same features you’d pay a premium for at a specialty shop.
The tradeoff worth considering is lead time and sizing flexibility. Wholesale cabinets typically come in standard width increments, so kitchens with awkward corners, sloped ceilings, or non-standard appliance openings may still need a few custom fillers or modified units to complete the job cleanly.
- Measure your space carefully before assuming you need custom sizing — standard cabinet widths run in 3-inch increments, and many “custom” requests just need clever filler panels instead
- Ask suppliers about semi-custom options that blend stock boxes with custom fronts — this can save 20-30% versus full custom while still giving you tailored finishes and hardware
- Compare warranty terms, not just sticker price, across cabinet lines — look for coverage on box construction, drawer glides, and door hinges separately, since these often carry different terms
- Check lead times too — full custom orders can take 8-12 weeks, while semi-custom and stock options may ship in 1-3 weeks, which matters if you’re paying for temporary kitchen setups
Countertop Material and Fabrication Costs
Countertops are deceptively expensive once you factor in fabrication, edge profiles, and installation, not just the raw material cost per square foot. A slab of natural stone might look affordable in the showroom, but cutting for sinks, cooktops, and seams can add hundreds or even thousands of dollars to the final bill.
Getting quotes from local countertop services before committing to a material is one of the smartest ways to avoid sticker shock later. Many homeowners also request a custom countertop when their kitchen layout includes odd angles or waterfall edges, and this level of customization should be priced and confirmed in writing before fabrication begins.
- Request itemized quotes that separate material, fabrication, and installation
- Ask about seam placement before finalizing your layout
- Bring home sample slabs to check how they look in your actual lighting
Plumbing Rerouting and Fixture Upgrades
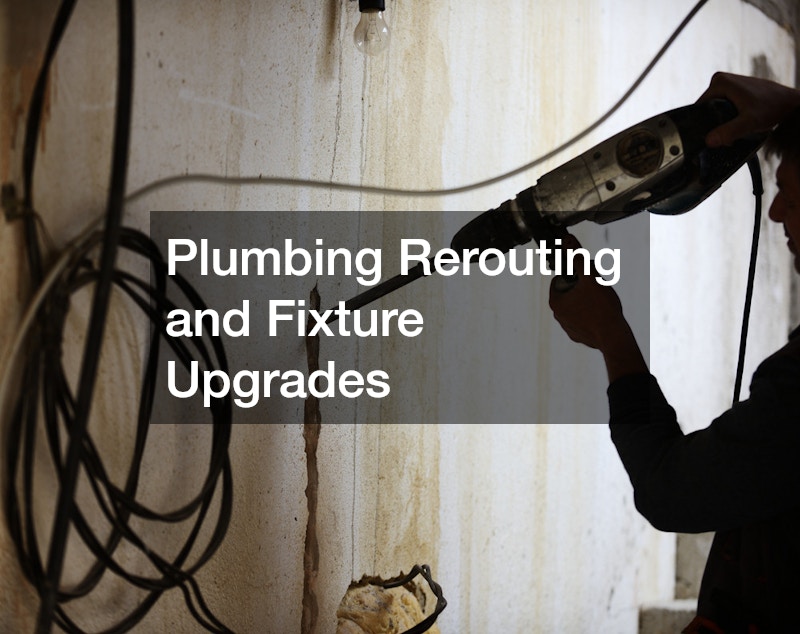
Moving a sink, toilet, or shower, even a few feet, can trigger a cascade of costs, since it often means rerouting supply lines and drain pipes hidden inside walls or under slabs. This is one of the fastest ways a modest bathroom refresh turns into a five-figure project, especially in older homes with outdated plumbing configurations.
Getting bids from multiple plumbing companies before finalizing your layout gives you a realistic sense of what relocation actually costs in your specific home. Some companies will suggest keeping fixtures in their existing footprint to avoid unnecessary excavation, which can save a substantial amount without compromising the overall design.
- Ask whether your home has cast iron, PVC, or copper piping before planning changes
- Request separate quotes for rough-in work versus fixture installation
- Consider keeping the toilet and shower in their original locations when possible
Electrical Panel and Wiring Updates
Older homes frequently need electrical panel upgrades to safely support new appliances, additional lighting circuits, or dedicated lines for things like induction cooktops and electric vehicle chargers. This work is often invisible in the finished space, which makes it easy to underestimate until an inspector flags it.
Hiring local electricians early in the planning process helps you understand whether your existing panel can handle the new load or whether a full upgrade is required. Skipping this step is a common way homeowners end up with mid-project change orders that add thousands of dollars after the walls are already open.
- Ask for a load calculation before finalizing appliance selections
- Confirm whether your panel needs a full upgrade or just adding circuits
- Budget separately for permit and inspection fees tied to electrical work
Door and Window Replacement Timing

Replacing exterior doors and windows is often bundled into larger renovation quotes, but the cost varies dramatically depending on materials, energy ratings, and whether the existing framing needs modification. Standard sizes install quickly and affordably, while custom shapes or reinforced security features add both time and expense.
Scheduling door installation alongside other structural work, rather than as an afterthought, can prevent costly re-measurement fees and reduce the number of separate contractor visits to your home. Bundling this work with other trades on site also tends to reduce labor costs, since crews are already mobilized and equipped for the job.
- Get exact measurements taken by the installer, not estimated from old specs
- Ask about energy efficiency ratings that may qualify for rebates
- Confirm lead times for custom sizes before finalizing your schedule
Exterior Finishes and Curb Appeal Projects
Exterior work is frequently treated as a lower priority than interior remodeling, yet it can quietly consume a large share of the budget if surfaces need extensive prep before finishing. Peeling paint, siding damage, or trim rot all require repair before any new coating goes on, and skipping prep work leads to failures that cost more to fix later.
The prep work itself is where estimates tend to fall apart. Scraping and sanding old paint, replacing rotted fascia boards, and re-caulking gaps around windows and doors can easily double the labor hours on a project that looked simple from the curb. Homeowners often budget for the visible finish coat while overlooking that 40-60% of an exterior painting job’s cost can come from surface preparation alone.
Siding replacement carries a similar hidden risk. Once old siding comes off, it’s common to discover water damage to the sheathing underneath, which means additional framing repairs before new siding can even be installed. A project quoted at $8,000 for materials and installation can climb past $12,000 once contractors uncover compromised wood beneath the surface.
Other curb appeal upgrades — new gutters, updated entry doors, driveway resurfacing — carry their own inflation risks tied to permits, drainage corrections, or grading issues that only become apparent once work begins. Getting a detailed inspection before finalizing a budget, rather than relying on a surface-level estimate, is the most reliable way to avoid these overruns.
Scheduling exterior painting during the right season and with proper surface preparation protects your investment and helps the finish last far longer. Most professional painters recommend working in mild, dry conditions—typically 50 to 85 degrees Fahrenheit with low humidity—since paint applied in extreme heat or cold can crack, blister, or fail to cure properly within a year or two.
Homeowners often underestimate labor time for this step, assuming it is purely a cosmetic afterthought rather than a project that requires scraping, sanding, and priming before a single coat goes on. Depending on the age and condition of the siding, prep work alone can consume 50 to 70 percent of total project hours, especially on older homes where multiple layers of failing paint need to be removed entirely.
Skipping or rushing these preparatory steps is one of the fastest ways renovation dollars vanish, since a poorly prepped surface may need repainting within two to three years instead of lasting the typical 7 to 10. Budgeting an extra 10 to 15 percent for unexpected repairs—like rotted trim or soft wood discovered during scraping—can prevent costly surprises mid-project.
Bathroom Enclosures and Waterproofing Details
Showers and tubs involve more than just tile selection, since waterproofing membranes, slope, and drainage all need to be correct to prevent leaks and long-term structural damage. Cutting corners here often does not show up as a problem until months or years later, when water damage has already spread into subfloors or adjacent rooms.
Many homeowners choose custom shower enclosures to fit awkward layouts or to maximize space in smaller bathrooms, and this customization typically requires precise measurements and specialized glass fabrication. Because these enclosures are built to order, changes made after fabrication begins can be costly, so confirming the final layout before signing off is essential.
- Verify that waterproofing membranes are installed before tile work begins
- Confirm glass thickness and hardware finish before fabrication starts
- Ask about lead times, since custom glass often takes several weeks
Renovation costs rarely disappear in one dramatic moment; they leak out steadily through structural surprises, permit delays, and specialty finishes that seem small until they add up. The best defense is asking detailed questions and getting itemized quotes before work begins, rather than after problems surface. Take time to research each phase of your project, compare multiple bids, and build a realistic contingency fund so your renovation stays on track from demolition to final walkthrough.