When evaluating the performance of a residential property, it is a mistake to view the structure as a mere collection of separate rooms. A home operates as an integrated, dynamic machine. Thermal envelopes, fluid circulation, electrical pathways, and mechanical barriers interact to maintain a stable indoor environment. Any internal system issue like friction, airflow resistance, or breaches in the weather perimeter forces the rest of the system to compensate, causing minor degradation and core components to use more power, accelerating wear and increasing utility bills.
Financial losses from reactive homeownership—marked by emergency service calls during extreme temperatures—can be avoided with preventive remediation. By identifying and addressing system issues, homeowners can achieve predictable returns on maintenance. Preserving property equity and preventing mechanical failure requires a comprehensive approach. Explore vital systems, from climate delivery to exterior barriers and foundation zones. By following these strategies, you can enhance your property’s energy efficiency and resilience.
Optimize Primary Climate Loops to Eliminate Thermal Drag

The central heating and cooling systems act as the lungs of your home, and their efficiency is entirely dependent on unobstructed airflow and precise thermodynamic transfer. When airflow is restricted, induction motors are forced to pull higher wattage to overcome static pressure, driving up electrical consumption. Maintaining optimal static pressure requires meticulous attention to the internal blower assembly and the broader ductwork network. Taking care of a necessary furnace repair—such as cleaning a carbon-coated flame sensor, replacing a weakened hot surface igniter, or swapping out a slipping and degraded blower belt—is critical to preventing the system from short-cycling and burning excess fuel.
Transitioning to the cooling cycle, efficiency relies heavily on the state of the refrigeration loop and the cleanliness of the heat exchange surfaces. A mere sixteenth of an inch of dust accumulated on an air conditioner evaporator coil acts as an incredibly potent insulating blanket. This dust severely reduces thermal absorption, driving up the compressor’s runtime and dramatically inflating summer energy costs. Proper maintenance requires addressing both the indoor coil and the outdoor heat rejection components to maintain the delicate balance of subcooling and superheat.
- Test Static Pressure Dynamics: Have a technician use a digital manometer to measure the pressure drop across the evaporator coil and filter housing. High static pressure indicates restricted return vents or a clogged blower wheel that must be cleared to lower electrical draw.
- Seal Ductwork Connections: Use fibrous mastic tape to permanently seal loose plenum seams and mechanical joints in unconditioned attics or crawlspaces, preventing costly conditioned air from escaping before it reaches your living spaces.
- Calibrate Filter Efficiency: Avoid installing heavily restrictive, high-MERV pleated filters unless you have verified that your blower motor’s horsepower can handle the resulting pressure drop without starving the heat exchanger of air.
- Straighten Condenser Fins: Carefully use a specialized fin comb tool on the outdoor condensing unit to straighten bent aluminum fins, which restores maximum airflow and heat rejection during the peak summer months.
- Clear Condensate Pathways: Flush the primary condensate P-trap with distilled white vinegar to dissolve algae buildup, and install an inline float switch to instantly cut power to the thermostat if a backup threatens to flood the blower cabinet.
Flush Heat Exchangers and Modernize Central Circulation Lines

Water heating and hydronic circulation represent massive portions of residential energy consumption. In storage-tank water heaters, continuous thermal cycling leads to the precipitation of dissolved minerals. Over time, calcium carbonate settles and creates a dense, insulating barrier at the bottom of the tank, effectively shielding the water from the gas burner or lower electric element. This forces the system to run up to a quarter longer to reach the designated setpoint. Executing proactive water heater repairs—including testing the temperature-and-pressure relief valve, replacing corroded sacrificial magnesium anode rods, and descaling calcified electric heating elements—will instantly restore heat transfer efficiency and prevent the tank from suffering premature internal rupture.
For homes utilizing central hydronic heating, evaluating the efficiency of the boiler plant is equally critical. Legacy atmospheric systems utilizing heavy cast-iron heat exchangers and standing pilot lights lose a vast amount of thermal energy straight up the masonry chimney. The financial and operational payoff of a comprehensive boiler replacement becomes obvious when upgrading from a standard 65 percent efficiency unit to a highly advanced 95 percent modulating-condensing system. These modern units extract sensible heat from the exhaust gases, turning water vapor back into a liquid state to capture latent heat that would otherwise be wasted.
- Execute a Deep Descaling Flush: Turn off the power or gas supply, attach a heavy-duty, high-temperature hose to the drain valve, and forcefully flush out bottom sediment until the expelled water runs completely crystal clear.
- Recalibrate Thermostat Setpoints: Adjust the central water temperature dial to exactly 120 degrees Fahrenheit to safely minimize standby heat dissipation through the tank walls without creating an environment conducive to bacterial growth.
- Purge Hydronic Air Pockets: Systematically bleed cast-iron radiators or baseboard convectors starting from the lowest floor of the house and working up to the highest level, eliminating air locks that block hot water flow.
- Refurbish Sticking Zone Valves: Inspect and replace sticking or failing motorized zone actuator valves to guarantee that hot water is only dispatched to the specific rooms where the local thermostat is actively calling for heat.
- Integrate Outdoor Reset Controls: Ensure your hydronic system utilizes an outdoor temperature sensor to dynamically adjust the circulating water temperature based on the exact real-time weather conditions outside.
Fortify the Exterior Perimeter to Halt Hidden Moisture Infiltration
The exterior envelope of a building is its primary defense against both thermal loss and structural moisture degradation. Even a minor breach in the roofing underlayment can allow slow, persistent water leaks to saturate ceiling fiberglass insulation. Once insulation becomes wet, its nominal thermal resistance value drops to near zero, creating a massive void where conditioned interior air rapidly escapes into the cold attic. Often, homeowners wait for a catastrophic leak to take action, but localized, highly targeted roof repair—such as meticulously re-sealing lifted architectural shingles, patching minor punctures in the ice-and-water shield, or installing new kickout flashing—can seamlessly restore the attic’s vital thermal barrier without the exorbitant cost of a total tear-off.
Simultaneously, the management of heavy rainfall runoff at the roofline directly impacts the stability and humidity of the home’s foundation. When gutters sag or separate, pooled water saturates the soil immediately adjacent to the perimeter walls, drastically increasing basement relative humidity and forcing indoor dehumidifiers to run continuously. Handling these specific gutter repairs swiftly—such as snapping a precise chalk line to re-establish a continuous one-quarter-inch drop per ten feet of lateral run toward the downspouts—ensures that gravity works effectively to pull bulk water safely away from the masonry foundation.
- Pinpoint Transition Failure Points: Conduct a thorough visual inspection of transition valleys, chimney step-flashing, and deteriorating rubber plumbing boot collars, replacing any materials that show signs of UV cracking or thermal contraction.
- Balance Attic Ventilation Ratios: Verify that the intake airflow at the continuous eaves is perfectly balanced with the exhaust capacity of the ridge vents, which can naturally lower summer attic temperatures by up to thirty degrees.
- Seal Failing Miter Joints: Vigorously wire-brush oxidation and organic debris from aluminum corner miters and end caps before applying a thick, generous bead of self-leveling urethane sealant to stop drips.
- Install Rigid Downspout Extensions: Attach rigid corrugated extensions to all downspout discharges, routing heavy roof runoff a minimum of six feet away from the foundation wall to alleviate intense hydrostatic pressure on the basement walls.
- Clear Debris to Halt Ice Damming: Remove compacted leaves and pine needles from horizontal channels before freezing weather arrives to prevent the formation of destructive ice dams that force melting snow upward beneath the lower courses of shingles.
Balance Voltage Loads and Reinforce Perimeter Mechanical Seals
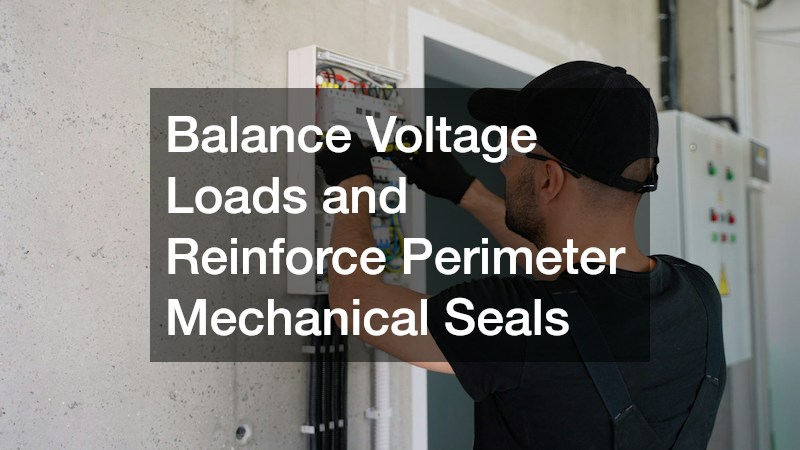
Electrical infrastructure and large perimeter access points are frequently overlooked when calculating a home’s overall operational efficiency. Outdated electrical service panels often struggle to handle the high transient loads required by modern variable-speed compressors and induction motors. This electrical resistance causes a noticeable voltage drop during peak appliance startup, generating wasted heat at the breaker bus bar and unnecessarily straining sensitive motor windings. Investing in a professional electrical panel upgrade to a 200-amp capacity creates necessary, dedicated pathways for high-draw systems like electric vehicle chargers, heat pumps, and induction ranges. This modernization reduces overall line resistance, guarantees clean power delivery, and eliminates the dangerous thermal degradation associated with overloaded, double-tapped neutral connections.
On a mechanical level, attached garages act as massive thermal bridges, allowing brutal outdoor temperatures to easily compromise adjoining living spaces. When the perimeter weatherstripping degrades, powerful unconditioned drafts push directly through the shared walls and into the home. Addressing these thermal breaches through systematic garage door repairs—such as completely replacing flattened or dried-out bottom astragal rubber seals, re-tensioning slack lifting cables, and swapping out grinding steel rollers for smooth nylon alternatives—drastically cuts down on phantom energy losses. A properly sealed and balanced heavy mechanical door protects the thermal integrity of the home.
- Diagnose Electrical Resistance Markers: Routinely inspect your main breaker box for concerning signs of thermal resistance, such as physically warm breaker casings, subtle buzzing sounds, or LED lighting fixtures that flicker whenever the central compressor kicks on.
- Install Surge Suppression: Mount a permanent Type 2 whole-home surge protector directly to the main service panel to aggressively defend the fragile, expensive inverter boards housed inside modern, high-efficiency appliances from grid voltage spikes.
- Verify Phase Load Balancing: Ensure that your heavy 240-volt appliances and heavily utilized 120-volt lighting circuits are evenly distributed across both internal bus bars to prevent asymmetrical overheating of the main utility feeder lines.
- Calibrate Torsion Spring Tension: Test the counterbalance springs by disconnecting the overhead operator; a correctly balanced door should allow you to lift the heavy barrier with just a few pounds of manual force, drastically reducing the electrical draw of the motorized opener.
- Apply Perimeter Jamb Weatherstripping: Secure flexible vinyl flap seals tightly along the exterior wooden or composite framing to physically block aggressive, wind-driven drafts from penetrating the sides and top of the primary overhead opening.
Remediate Thermal Leaks Across Sub-Levels and Lower Living Zones

Because of a building science principle known as the stack effect, basements and crawlspaces largely dictate the thermal and moisture baseline for the entire house above them. As warm air naturally rises and escapes through the upper levels of the property, negative pressure pulls cold, damp, unconditioned air from the subterranean levels directly into the main living spaces. Subfloor structural integrity is vital to stopping this upward thermal siphon. If the structural sheathing has settled or decayed, bringing in a highly skilled flooring contractor to screw down loose and squeaking plywood, inject high-density leveling compound into low spots, and replace rotted underlayment is an absolute prerequisite before laying down any finished surface. Stabilizing these materials halts cold air infiltration and prevents localized structural bridging.
Below-grade exterior openings present another massive liability for heat retention. Aging, single-pane casements set directly into concrete foundations allow cold winter drafts to easily infiltrate the basement, chilling the entire floor assembly above. Remediating this sub-grade air and water intrusion involves sealing the perimeter with expanding closed-cell foam. Furthermore, retrofitting an aging steel or wood frame with a properly insulated, modern egress window that features double-pane Low-E glass preserves these vulnerable lower heat zones. This modification also introduces vital, code-compliant passive cross-ventilation, reducing the need to run mechanical air conditioning during milder transition seasons.
- Deploy Under-Floor Thermal Barriers: Install foil-faced polyisocyanurate sheets or specialized rigid foam barrier underlayments beneath floating plank systems to physically block the cold concrete slab from sapping surface heat.
- Manage Moisture Vapor Transmission: Always lay down a continuous six-mil polyethylene slip sheet directly over the concrete before installing subfloor panels to prevent natural foundation moisture from warping wood and elevating overall indoor humidity levels.
- Seal the Outer Rim Joist: Vigorously spray expanding closed-cell polyurethane foam directly into the precise corners where the wooden floor joists meet the outer concrete sill plate, completely sealing the home’s most notoriously drafty transition point.
- Establish Exterior Well Drainage: Excavate compacted dirt from exterior corrugated window wells and refill them with deep, washed gravel sumps to prevent torrential surface runoff from pooling and actively leaking through the lower window frame seals.
- Install Clear Polycarbonate Well Covers: Mount sloped, shatter-resistant clear covers over the exterior basement window wells to permanently block accumulating snow, wet autumn leaves, and driving rain from decaying the lower operational sashes.
Eliminating mechanical friction, tightly sealing the building envelope, and modernizing internal service lines together reduce a home’s utility costs. When ductwork is sealed, the furnace runs less; when roof and weatherstripping block drafts, air conditioning works efficiently. Transforming from reactive maintenance to strategic maintenance involves a reliable, four-season inspection routine. In spring, clear outdoor drainage and clean heat rejection coils. In summer, evaluate insulation and track electrical loads. In autumn, tune heating systems and purge air. In winter, monitor drafts and regulate indoor humidity. Long-term asset preservation relies on proactive system tune-ups and reinforcements, ensuring a safe, efficient, and comfortable environment regardless of weather conditions.